How to Mount Servers in a 2u Wall Mount Rack?
Posted by Admin on Oct 7th 2020
2u wall mount rack is a wall mount network rack that provides a solution for mounting your devices or servers on the wall directly. It is a great option for small offices and home offices that don’t have space to have a data center. It allows you to install the equipment vertically and looks good on the wall.
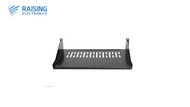
If you want to install a device on a 2U wall mount rack, you can need rails or L brackets. Ears on the servers are not to support the weight of the servers, but to keep the servers locked in the place. You will also need a 2 post server rail. The whole process of installing remains the same as the other wall mounting server racks.
Steps to install the server rack:
- Check if your server is compatible with the rack: Before installing, you must make sure that your server will fit into the rack. You should not install a server into an improper rack. Forcing the server to fit inside a wrong server rack might result in damaging the server.
- Finish mounting the rack on the wall: By adjusting the width and depth of the rack, insert the screws on the mounting post and then assemblies. Then tighten the screws and verify if the rails are firmly fit.
- Mount the server on the rack: Now, carefully mount the servers on the rails and make sure to lock it in the place. Also, you have to manage the cables well by assembling the cable management arms and inserting it into the backside of the rail.
- Check out if there’s proper airflow: Servers are needed to be kept in the racks, that provide proper airflow to the servers and prevent them from over-heating and resulting in malfunctioning of the servers.

